Installation core features
- 22 Aug 2023
- 2 Minutes to read
- Print
- DarkLight
- Download PDF
Installation core features
- Updated on 22 Aug 2023
- 2 Minutes to read
- Print
- DarkLight
- Download PDF
Article summary
Did you find this summary helpful?
Thank you for your feedback!
Install Atomic Scope Core Features
- Download the Atomic Scope Installer MSI package
- Open a Command Prompt with Administrator access. Navigate to the folder where you have downloaded the installer package
- Type the entire file name with the extension “.msi”. This will open the Atomic Scope installer
- Click Next and accept the License Agreement

- Click Next to customize your Atomic Scope setup. In this step, you can choose the features available for installation and you may also choose a custom directory for the installation.
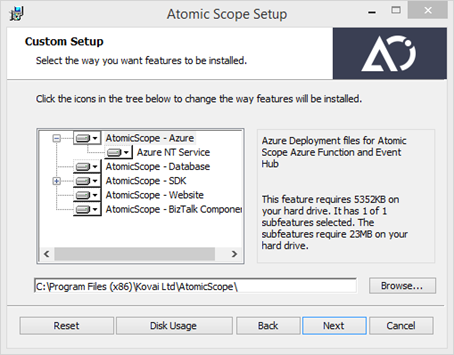
There are mainly five core features installed as part of the Atomic Scope installation. You can install these features separately on different servers. Features are explained below.
| Feature | Explanation |
|---|---|
| Atomic Scope – Azure | This feature is optional and only need to be installed if you are using Atomic Scope for Logic Apps. For BizTalk only scenarios, it is optional. The feature can be installed on a separate server on its own. |
| Atomic Scope – Database | The configuration and tracking data will be stored in Atomic Scope DB. It is recommended to choose this option along with Atomic Scope- Website feature. Note: If Atomic Scope Database already exists, installer deletes the existing database and creates a new one. Upgrade installation will only update the latest modifications to the database schema. |
| Atomic Scope – Website | This feature installs Atomic Scope portal. The feature can be installed on a separate standalone server Note: If you are tracking data from BizTalk, ensure that application pool user has read-only permission on BizTalk management DB |
| Atomic Scope- BizTalk feature | This feature needs to be installed on all the BizTalk servers in your environment. It means you will have to run this installer on all BizTalk servers and select BizTalk feature for the installation. |
| Atomic Scope – SDK | There are some sample BizTalk and logic App applications available for you to get started quickly in SDK. It is recommended to install this SDK only in development environment. |
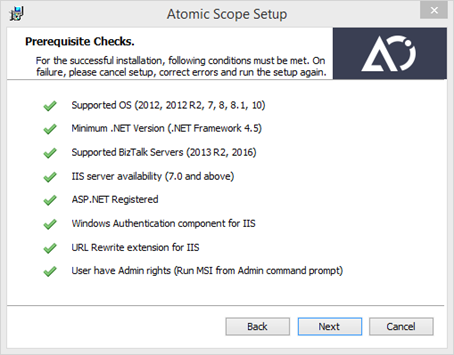
- Click Next. You will see the Prerequisite Checks screen. This step will validate all the installation requirements
- If you followed the steps from prerequisites mentioned above, all the checks would pass
- If there is an error in the prerequisites check, resolve the issues, restart the Atomic Scope installer and follow the steps from 1 — 6. Now, you will see that all the Prerequisite checks are passed successfully
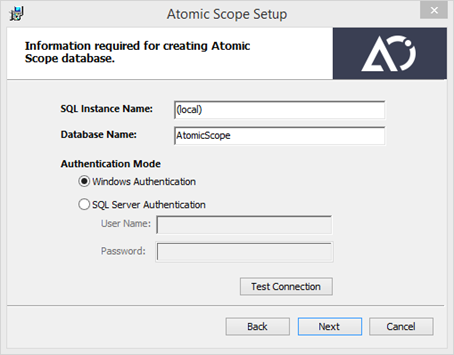
- Click Next. The SQL Instance Name and Database Name will be automatically selected by default. You can test your Windows /SQL Authentication by using the Test Connection button.
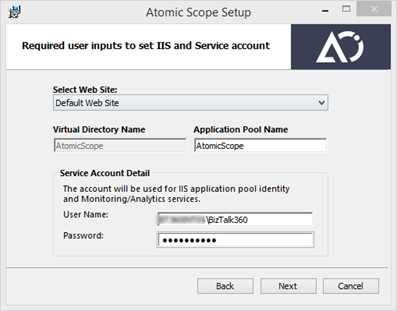
- Click Next. You need to provide the Service Account Details for IIS Services. Enter the credentials in the space provided.
- In the User Name field, enter your System Name/User Account name
- The System name can be found by right-clicking on Start –> System or My Computer -> Properties
Note: If Atomic Scope is used to track data from BizTalk, then you should ensure that User account configured here has read-only access to the BizTalk management database.
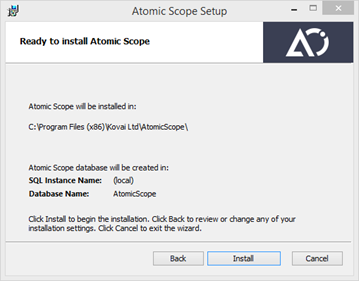
- Click Install - The installer will start installing all the selected services and features. If there are any errors, you can click the View Installation Log checkbox at the end of the installation. You can share the log files with us to help you solve the problem.
Was this article helpful?