Business Process Configuration
- 14 Jul 2020
- 5 Minutes to read
- Print
- DarkLight
- PDF
Business Process Configuration
- Updated on 14 Jul 2020
- 5 Minutes to read
- Print
- DarkLight
- PDF
Article Summary
Share feedback
Thanks for sharing your feedback!
To enable business process tracking with Atomic Scope, you need to define the business process, transactions and stages (milestones) in the Atomic Scope portal. The configuration is leveraged by runtime components to track messages and correlate various stages and transactions together.
This document shows you the steps to create the configuration for your business process.
Before we get started with configuration, let’s get familiar with some of the terminology used in Atomic Scope.
Workspace – A logical container that encompasses both BizTalk servers and Azure subscriptions. You can either map a workspace to an environment like Dev, Test, Production or to a business unit like Finance, Supply Chain, HR, etc.
Business Process - A collection of related transactions that serves a business goal for the customer(s). For example, Order to Cash is a business process that encompasses multiple business transactions.
Business Transaction - A collection of related stages or milestones that achieve a specific activity. For example, Order, Invoice, Shipment, Payment are few business transactions in the Order to Cash process.
Stage - A milestone within a business transaction that performs a well-defined task. For example, receiving an order from a customer, transforming it to a format that supplier expects and sending the order to supplier system are few milestones in the Order transaction.
Properties - A value in the business transaction which is of specific importance in the context of the transaction. For example, OrderId, Price could be a couple of data values that business might be interested to track in the Order stage. They can be searched if the property is a global property.
Getting Started
The first step in configuring the business process is to identify the logical grouping of transactions. You may decide to keep all transactions specific to a business unit such as Finance, Supply Chain in their respective business processes or at more granular level. Once you arrive at a strategy on how to group the transactions, start with defining the business process, related transactions and stages in the Atomic Scope portal.
Configure Business Process
- Select the Workspace under which you want to configure the business process.
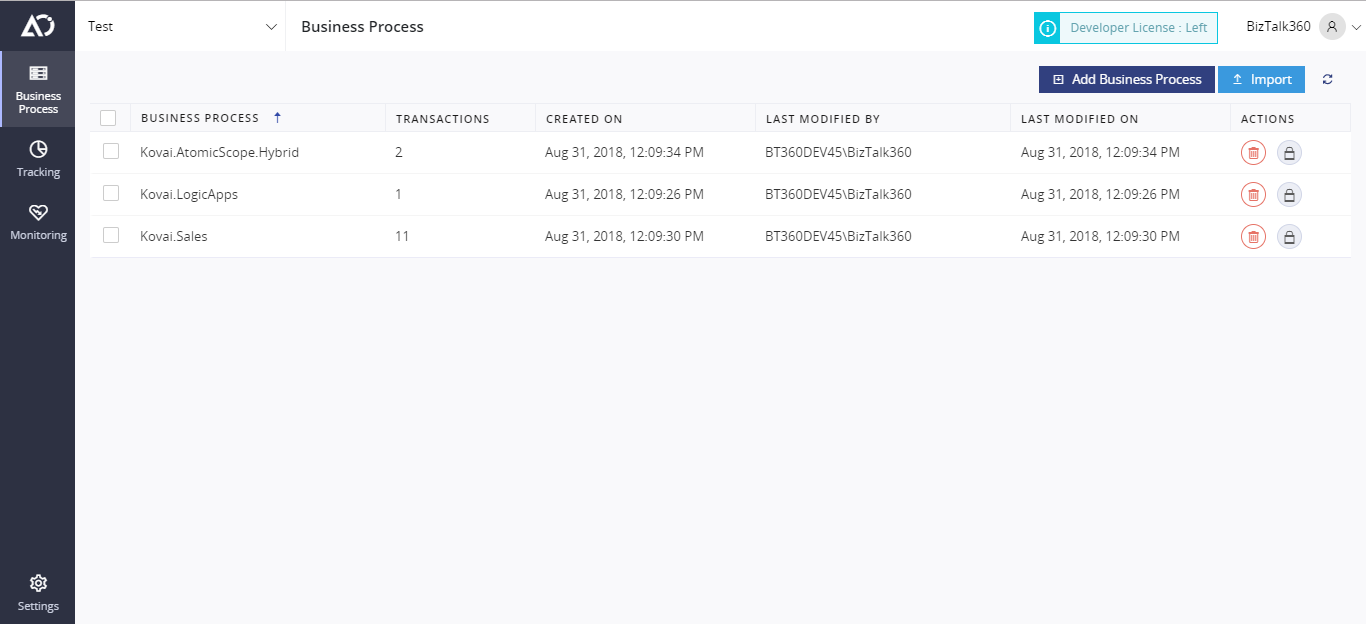
- Click on Add Business Process button
- Enter the Business Process name and click Add Transaction to configure the transaction.
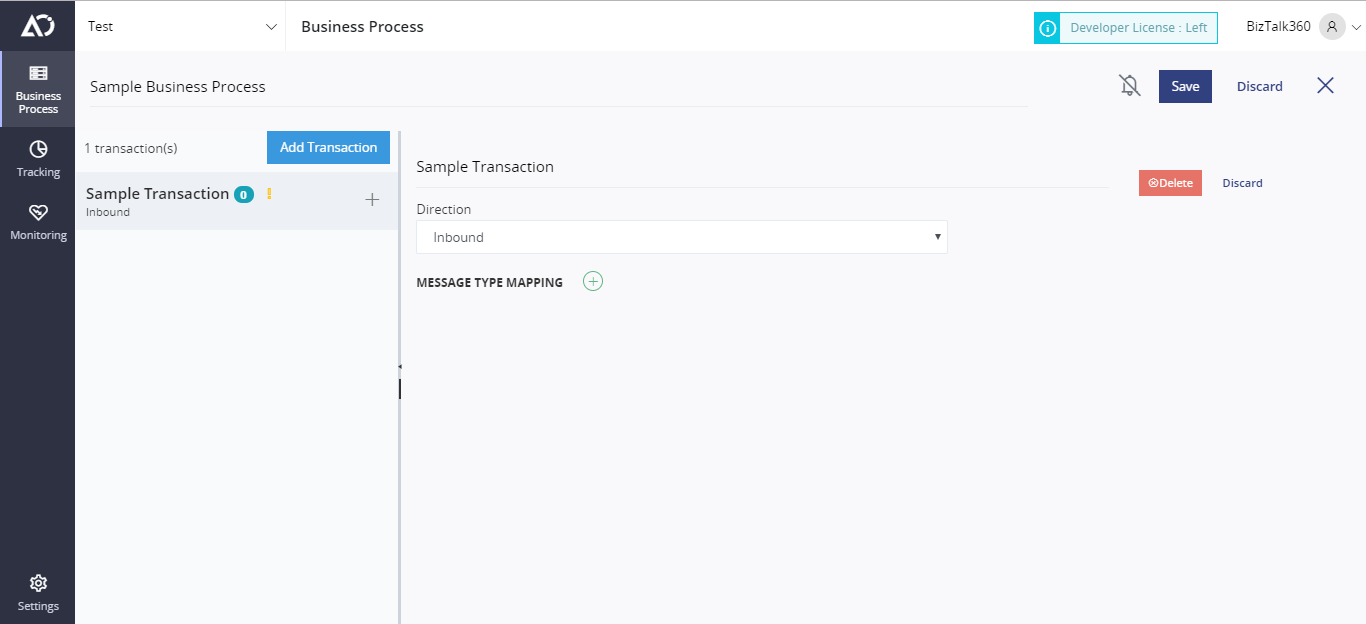
- Specify the Transaction name and select Direction to indicate the message flow direction. You may select Inbound for transactions that are received by your organization from external partners/systems and select Outbound for transactions that your organization is sending.
- Click Add and repeat the above steps to specify all transactions that will constitute the business process. You may also choose to specify one transaction at a time and configure the stages for it before adding another transaction.
- Click Save to save the changes or click Next to configure the transactions.
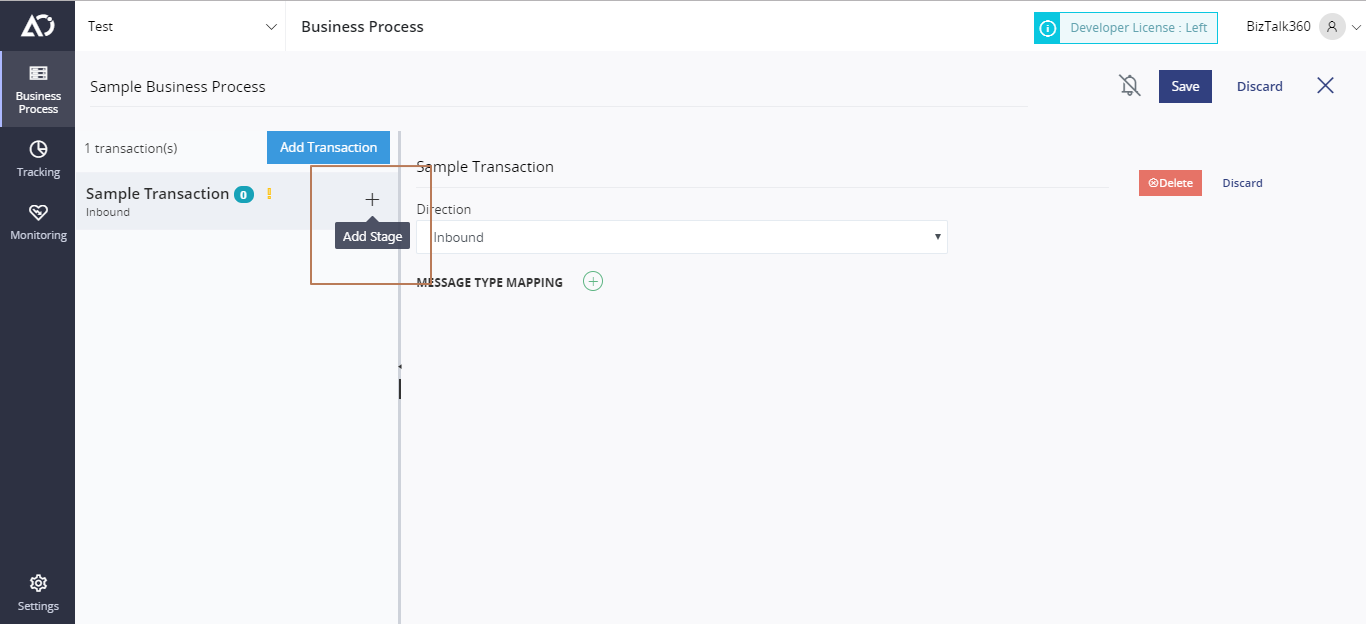
Configure Transaction
The next step in configuring the business process is to specify the milestones that occur in a specific transaction. These milestones are specified in the form of Stages.
You may add one or more stages to the selected transaction.
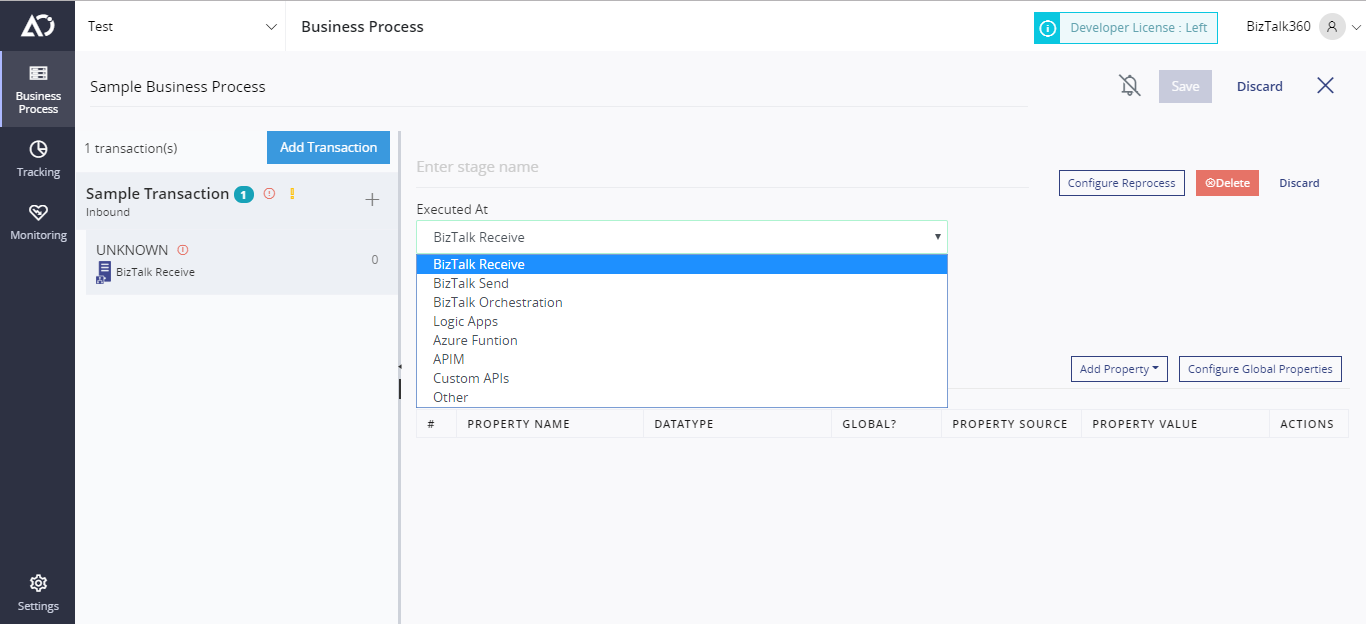
- Click the Add Stage button and provide a Stage Name and Stage executed at.
Note: Currently for stages executed in the Logic App, there are no custom properties supported.
- Click Next to configure the stages information
Configure Stages
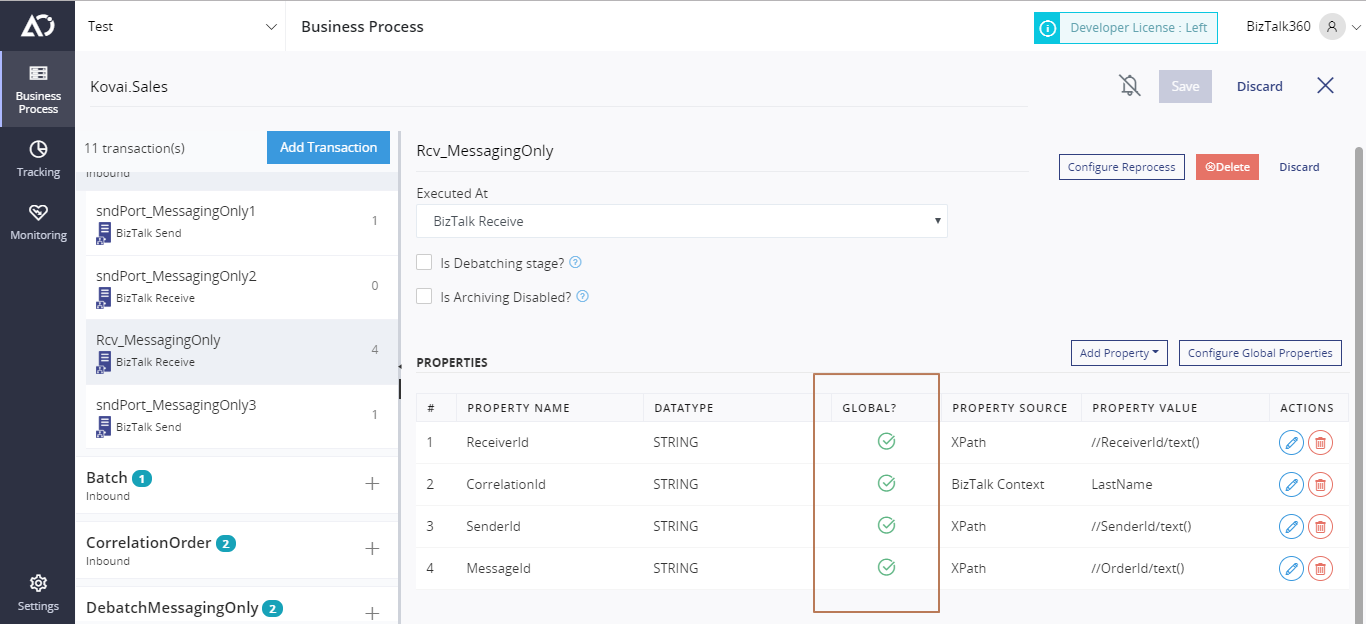
In this step, you must provide the business values of interest as properties. While you can specify as many properties to track as you need.We have identified 6 properties as search fields, listed below:
- Message Id – Any property either from the message context or message body that uniquely identifies a message, e.g., order id, invoice id, etc.
- Sender Id – Sender application, system, or partner of the message
- Receiver Id – Receiving application, system, or partner of the message
- Correlation Id – Any property used to correlate transactions in a business process, e.g., order id can be used for correlated order and order acknowledgement transactions.
- Batch Id – For transactions that supports the batch message, especially in case of EDI, specify the common identifier across all related transactions.
- Message Type – Specify the transaction type of the message. If you don’t specify this value, BizTalk Message Type property will be fetched at runtime.
- If you send an XML message use the Xpath as Property Source and Json Path for a json message. If the added property is a global property then the global column shows a small tick mark to indicate that it is a global property. Stage properties are shown without them.
- Click Save to save the configuration and close the wizard
Note
You can import/export business process or transaction from Atomic Scope portal at any point of time.
Graphical Business Process Designer
Atomic Scope allows you to visualize your business transaction in Tracking UI. But it is loosely coupled and Atomic Scope tracks down all the stages even if the stage is not found at a particular business transaction. So it logs every stage and sometimes in the flow, you would be able to see some unexpected stages.
And also let's say if there are any missing stages in the respective business transaction we weren't showing it in Tracking UI. So how about asking the user to configure workflow and we will just use the same in the Tracking UI.
That's why we have this feature. Basically you can configure one workflow per transaction. Whenever you configure your business process, you can straight define your workflows.
Configure Workflows
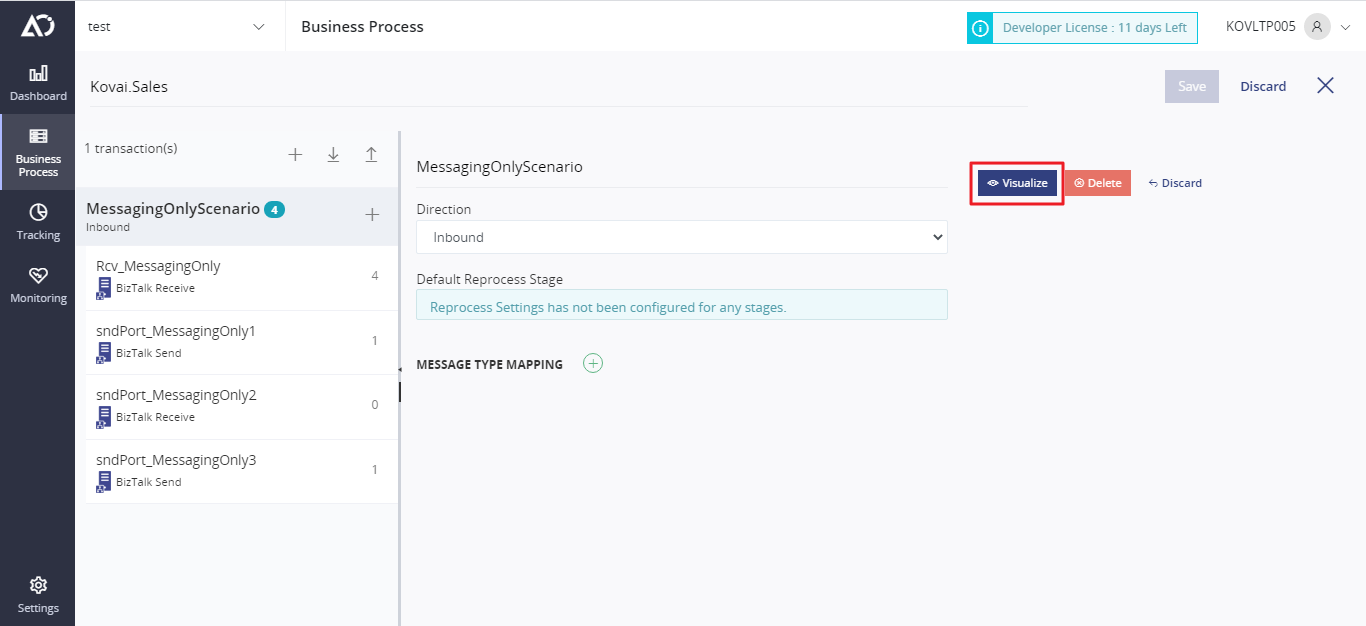
- At the transaction level, you will be able to see a button called Visualize.
2. If you click on that respective button, a dialog will open where you can draw your workflow.
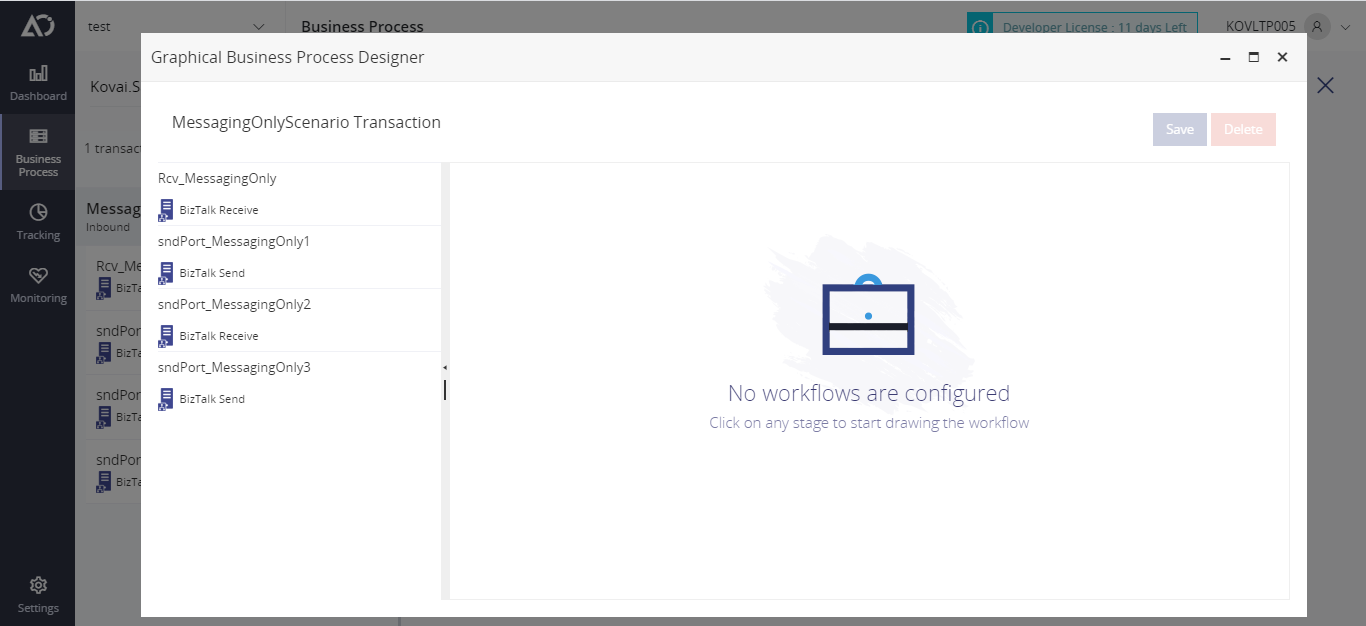
3. There are two panes. On the left pane we have the stages listed and on the right pane is where you draw your workflow. You can start drawing the workflow by clicking on the respective stage.
4. Once you have drawn the workflow, you can save it by clicking the save button.
5. You can edit or delete workflows at any point of time.
6. And also you can import/export this workflow configuration while import/export business process configuration.
Once you have configured the workflow, you can expect the respective workflow in the Tracking UI.
Was this article helpful?