Installing Azure components
- 21 Jan 2021
- 2 Minutes to read
- Print
- DarkLight
- Download PDF
Installing Azure components
- Updated on 21 Jan 2021
- 2 Minutes to read
- Print
- DarkLight
- Download PDF
Article summary
Did you find this summary helpful?
Thank you for your feedback!
Deployment from Atomic Scope Portal
To Deploy Azure resources from Atomic Scope portal you will need a valid Service Principal with ClientId , Client Secret and Tenant Id created. To know more about Service Principal see documentation.
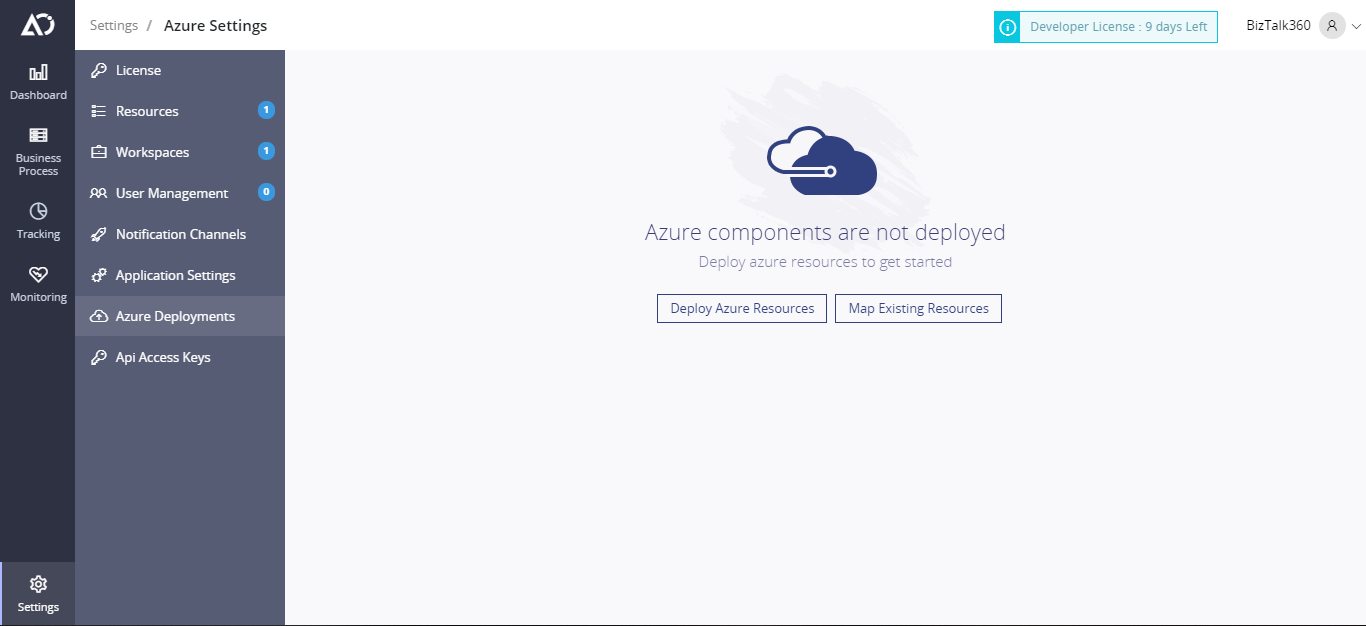
- After obtaining the ClientId,ClientSecret and TenantId navigate to AtomicScope portal -> Settings -> Azure Deployments
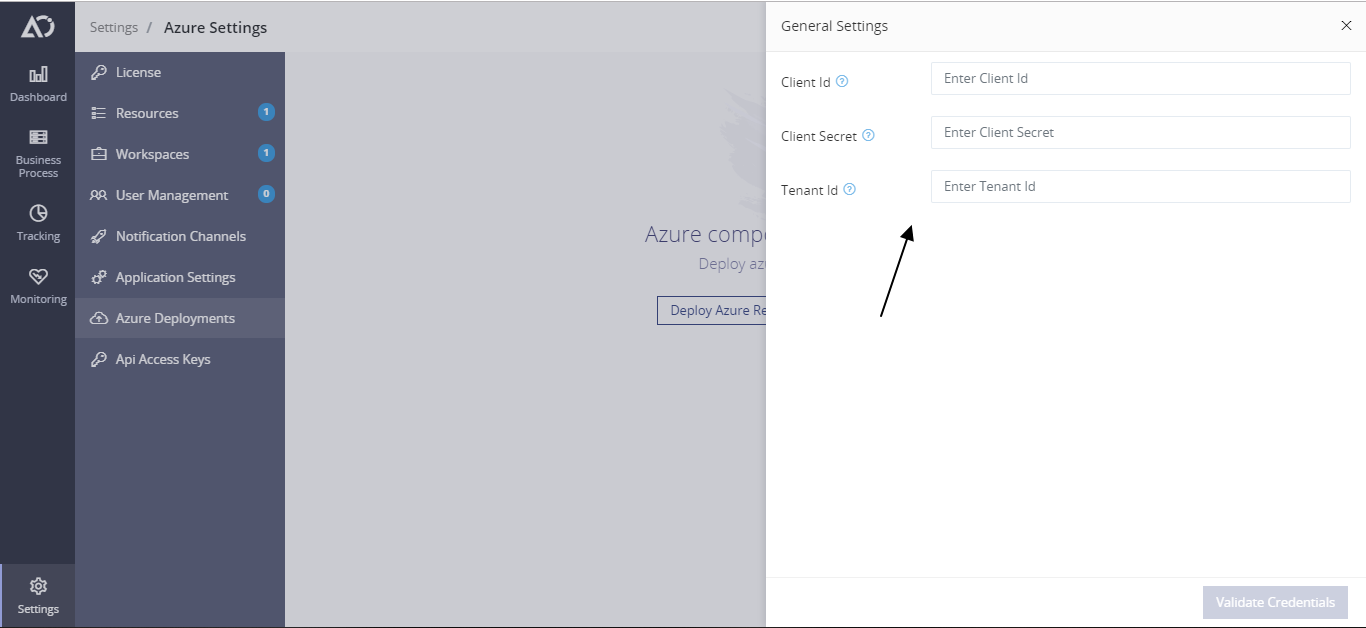
- Enter the required values and click Validate Credentials to check if the credentials are valid
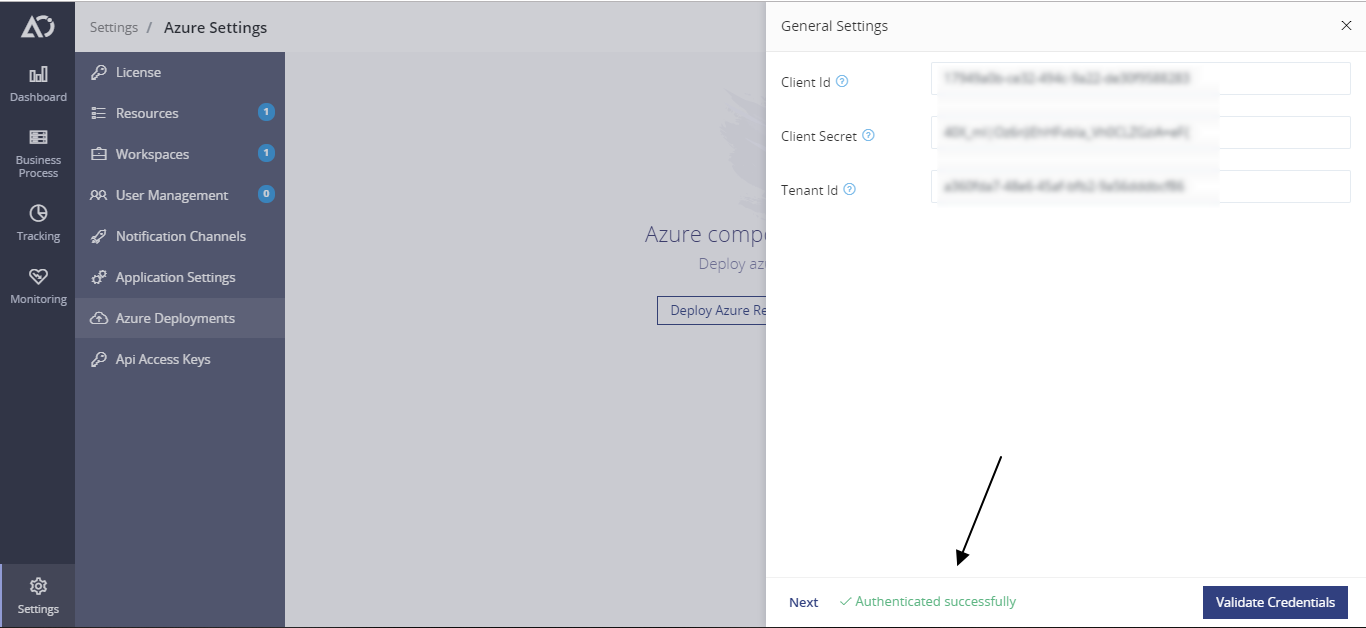
- After successfull authentication you can deploy the Resources.
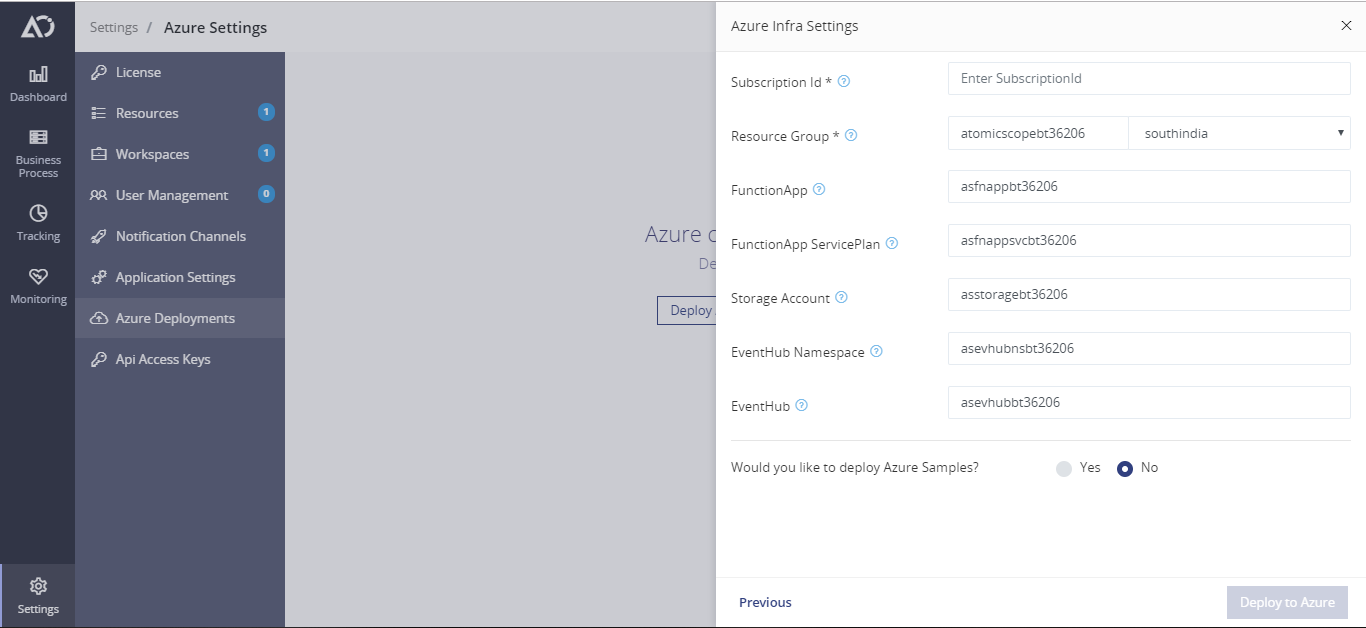
The resource names will be automatically generated. You will only have to provide the SubscriptionId for deployment using the default values. You can also change the resource names if necessary.
4. Click on Deploy to start the deployment.
Deployment using powershell scripts
Prerequisites
Before proceeding with this section, you must have the following:
- An active Azure Subscription
- Azure Az Module
- A Resource Group to deploy Atomic Scope Azure Components
- ClientId , ClientSecret and TenantId with permissions to access Azure REST API's.
If you don't have an Azure subscription, create a free account before you begin.
You can install AzureAz module by running Install-Module -Name Az -AllowClobber from an elevated powershell window.
Setup
After installing the Atomic Scope product, you will see the folder structure as shown below in the install path you selected during the setup.

Note: Install AzureRM module of PowerShell as mentioned in Install Windows PowerShell 5 from this section.
Important: If you are deploying from PowerShell make sure you have access to the Atomic Scope database.
- Run PowerShell as Administrator (Mandatory)
- Navigate to the Azure folder where the PowerShell script is located by using
o cd \Directory Location (in the folder structure as shown previously) - You will find a PowerShell script called Deploy-AzureInfra.ps1. You need to run this script in PowerShell.
- Type the below command to run the PowerShell script
o .\ Deploy-AzureInfra.ps1. When prompted, log in with your Azure account and follow prompts to deploy the Azure components required for the product.
The above steps will deploy all the mandatory artifacts required by Atomic Scope to integrate with your Logic Apps.
Proxy and Firewall setup for Atomic Scope Event Hub consumer service
If you selected Azure NT Service component while running the product setup, and if you are using a proxy on your network, please follow the steps below.
Atomic Scope consumer service makes use of Azure storage and Azure Event Hub services for logging Logic App activities into the database. We need to ensure a couple of things for it to work correctly.
- Adding proxy details: Follow below steps to add proxy details
a. Open the file/Kovai.AtomicScope.Service.exe.config
b. Uncomment the System.Net section
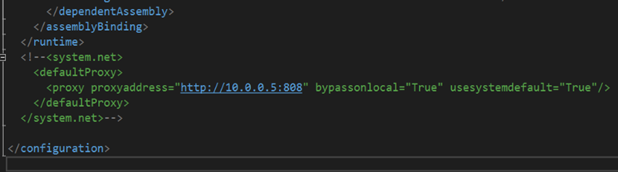
c. Change the proxy address field with your proxy details
- Enabling outbound traffic for AMQP port: To receive messages from Event Hub, consumer service will open outbound connections on port 5671. You will have to open this outbound port in the firewall.
Was this article helpful?