Azure only scenario
- 12 Jul 2021
- 5 Minutes to read
- Print
- DarkLight
- Download PDF
Azure only scenario
- Updated on 12 Jul 2021
- 5 Minutes to read
- Print
- DarkLight
- Download PDF
Article summary
Did you find this summary helpful?
Thank you for your feedback!
Atomic Scope helps in getting an end to end visibility of integration solutions built using Azure Integration services such as Logic Apps, Azure Functions, APIM etc. In this article we will walk you through a sample Purchase Order processing scenario implimented using Logic App and Azure function.
Scenario
The modern integration solutions will be implimented using a service bus architecture or a micro services architecture or a mix and match of both concepts. In our scenario a company called MIUG has a business process called MIUG.SalesProcess. A sales process can have multiple business transactions. However for the bravity we are going to focus on PurchaseOrder business transaction.
The transaction flow is as below.
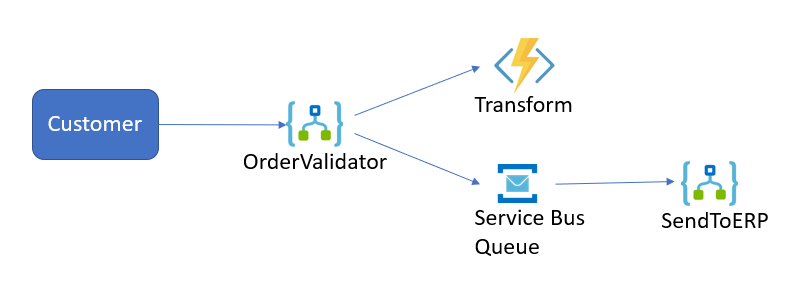
As we can see from the picture above, the purchase order sent from a customer goes through three key stages of processing . These stages are OrderValidation, Transform and SendToERP. We will be using Atomic Scope components in these stages.
Pre-Requisites
To continue impimenting the scenario, please ensure you have followed the below steps.
1> Ensure you have installed Atomic Scope Core components
2> Ensure that you have installed Azure components
3> Ensure that you have activated Atomic Scope License
4> Ensure that you have deployed the Azure samples. MIUG.SalesProcess is also part of this. This means you do not have to create the Azure Logic Apps , Function, Service bus queue on your own. It will all be available for you to start working with atomic scope.
5> Ensure that you have created a work space and added associated azure resource group
Business Process configuration
In his section we will walk you through creating business process, transaction, stages and tracking necessary data.
Note: You can directly import the configuration file if you do not want to recreate it from  the beggining.
* Navigate to Business Process section in Atomic Scope portal
* Click Import , choose configuration file C:\Program Files (x86)\Kovai Ltd\AtomicScope\SDK\Samples\Configuration\MIUG.SalesProcess.json
* Select MIUG.Sales Process from the list nd click import.
Creating Business Process
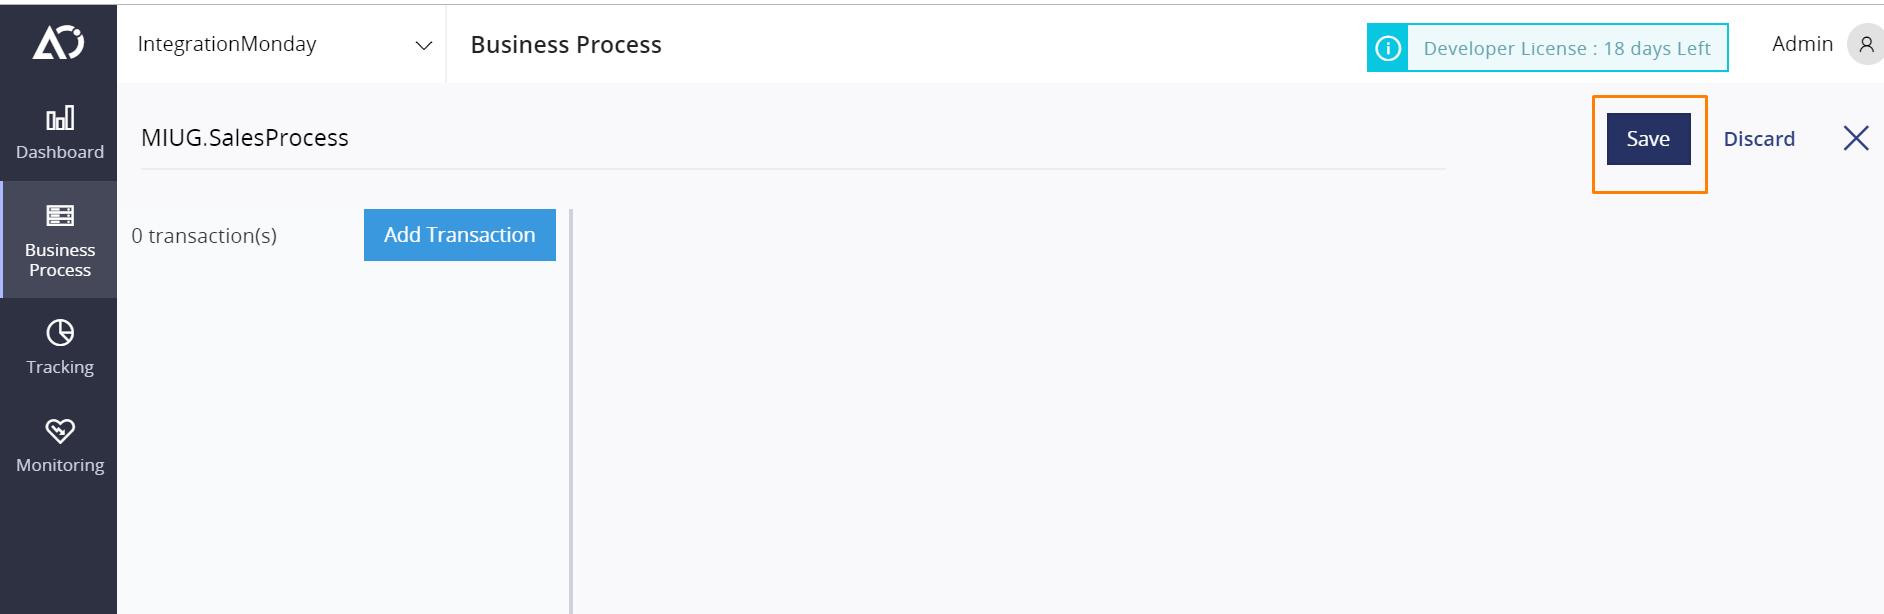
- In Atomic Scope portal, navigate to Business Process section and click on Add Business Process button.
- Name the business process as MIUG.SalesProcess
Creating Business Transaction
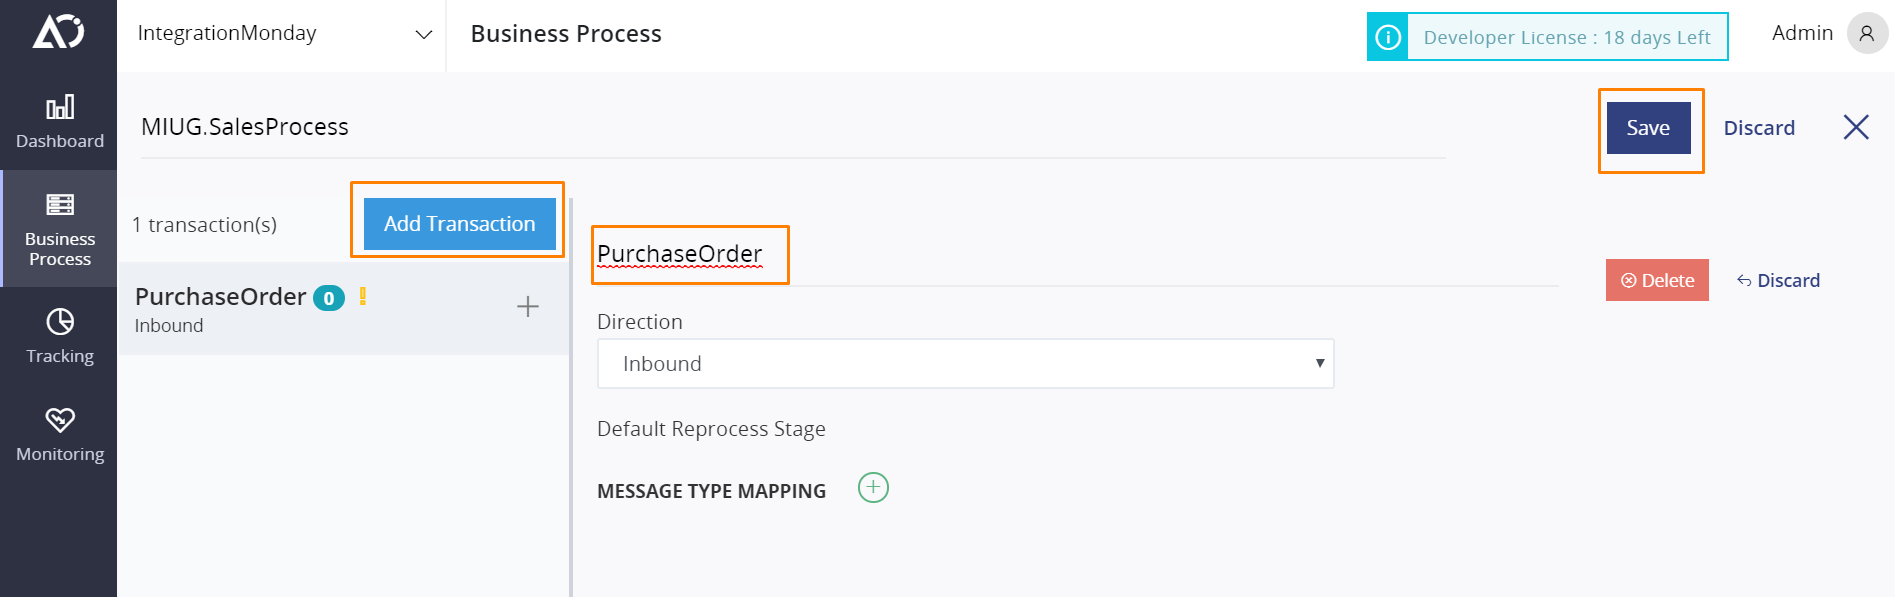
Click on Add Transaction, name the transaction as PurchaseOrder
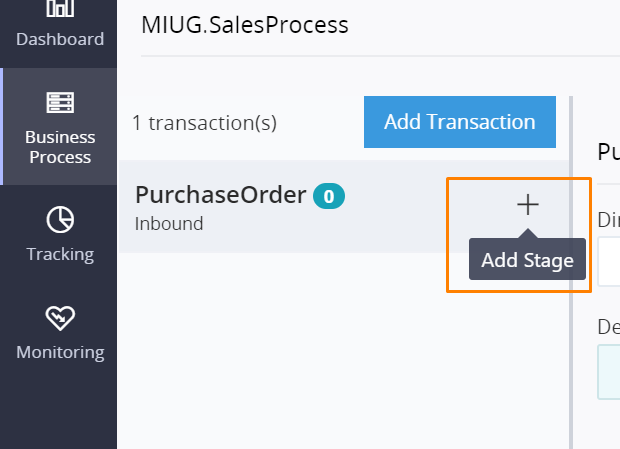
Creating Stages
Follow the steps below to create a stage called OrderValidation which will be executed in OrderValidation logic app
Click on the Add Stage button
Name the stage as OrderValidation . Since the stage is executed in logic apps, select correct entry from dropdown box.
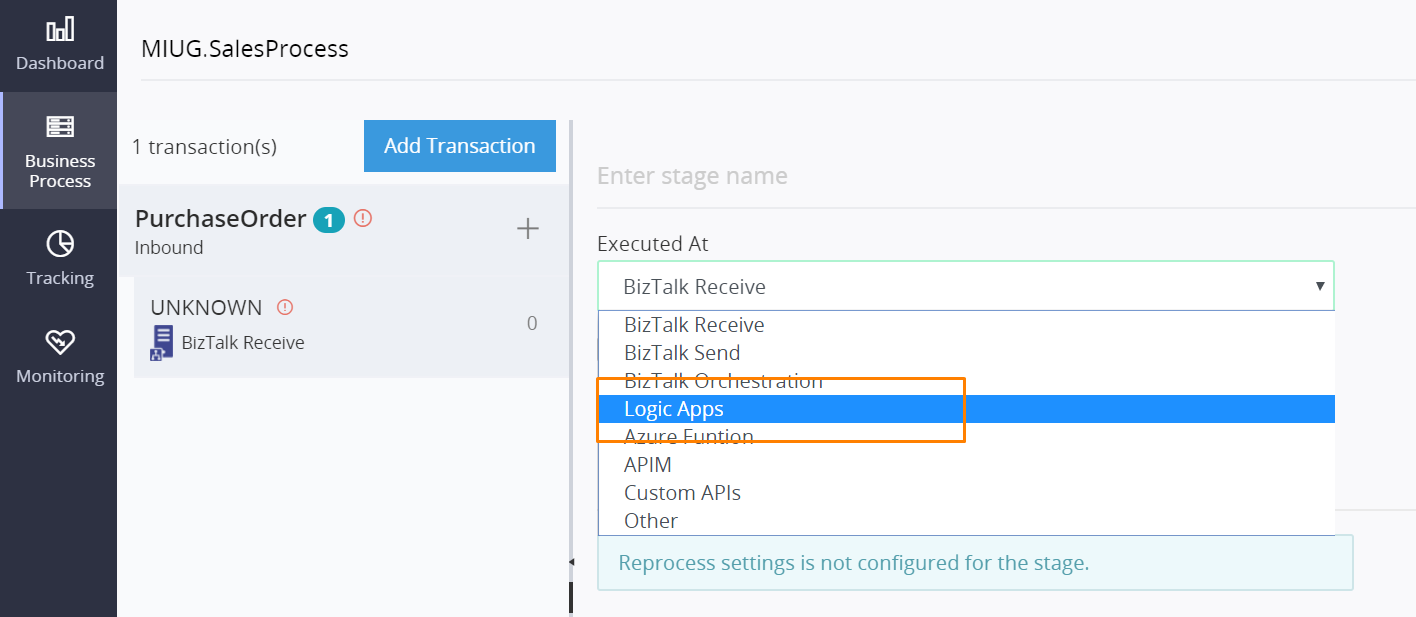
Similarly create stages named Transformation and SendToERP which are executed at Azure function and Logic Apps respectively.
Adding Global Properties
Once we create the stages, we can start adding the tracked properties which will be collected during the runtime. The global properties are those which will be available in the grid.
Similarly add following global properties.
| Stage | Propertyname | PropertyType | PropertySource | Value |
|---|---|---|---|---|
| Transformation | MessageType | String | Constant | PurchaseOrder |
| SendToERP | SenderId | String | Json Path | senderId |
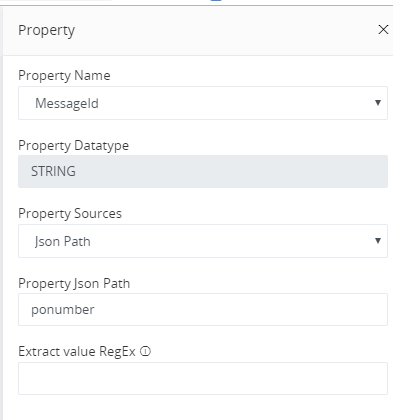
Adding stage Properties
Similar to global properties we can add follwing stage properties. Stage properties are collected at each stage and available as tracked values.
| Stage | Propertyname | PropertyType | PropertySource | Value |
|---|---|---|---|---|
| OrderValidation | Quantity | Number | Json Path | quantitiy |
| OrderValidation | Product | String | Json Path | sku |
| SendToERP | City | String | Json Path | City |
| SendToERP | BusinessUnitName | String | Constant | Lubes |
Instrumenting in OrderValidation Logic App
The first stage in the transaction processing is OrderValidation. We will have to use Atomic Scope connectors to log the activitis.
Note: The Atomic Samples which are installed , already have these connectors configured correctly. In this section we will talk about significance of the configuration.
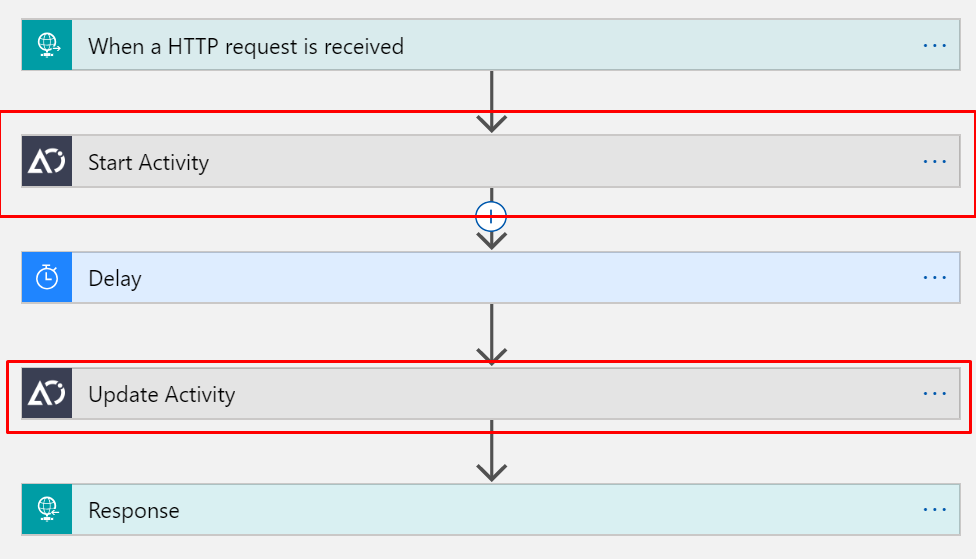
The start activity and update activity connectors will be used at the begining and end of the validation logic inside the logic app as shown below.
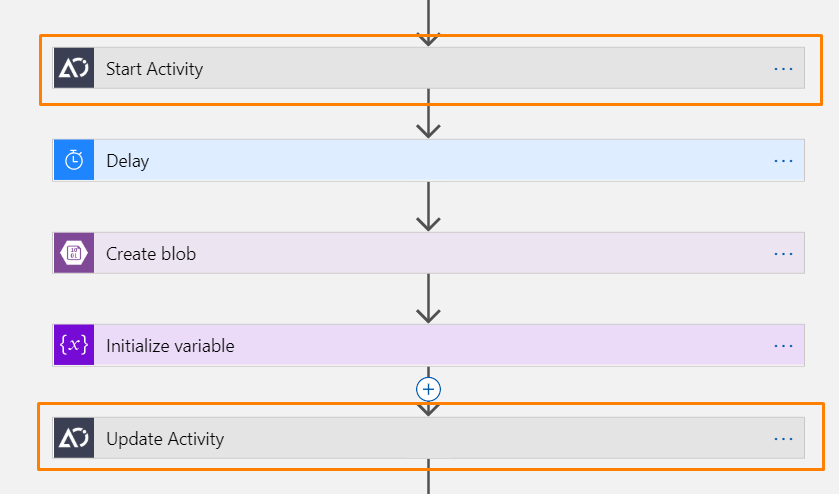
Start Activity Connector
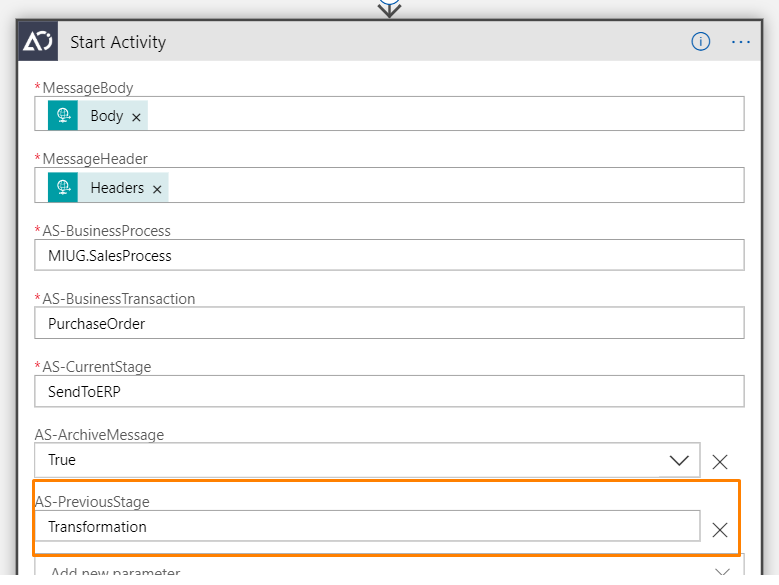
The start activity connector initiates a stage and logs the time at which the stage is started. Hence the stage will be in the beginning of a logic . In the start activity connector, configure following properties. These properties are the same as the ones which were defined in business process configuration.
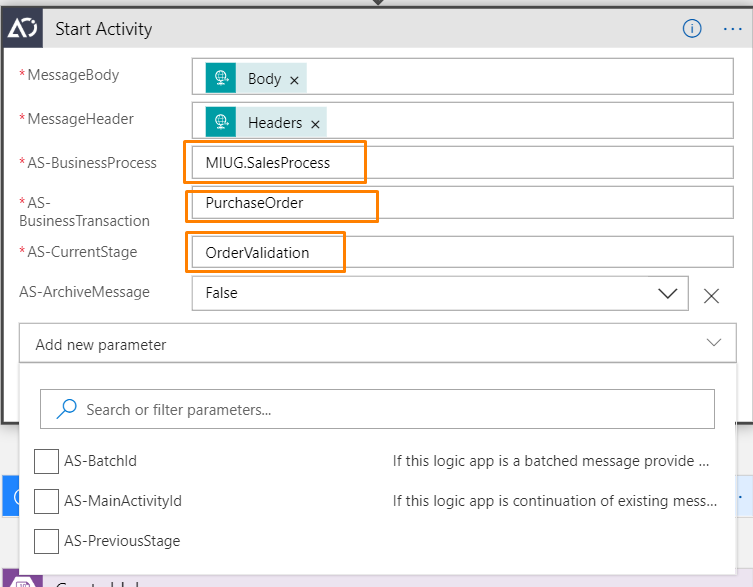
The start activity connector returns two fields in its response. MainActivityId and the StageActivityId. The MainActivityId is a correlation id for the complete transaction. It will be used for the stages further in the flow. StageActivityId is specific to stage and will be used in Update Activity Connector.
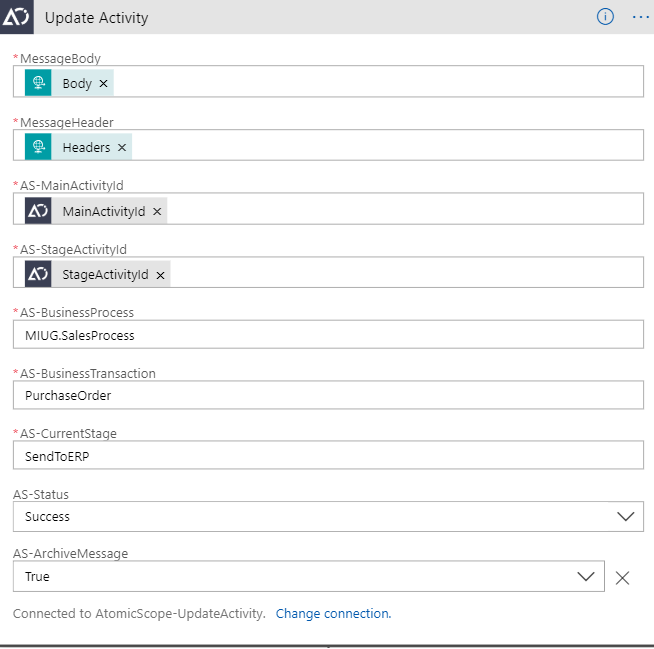
Update Activity Connector
The update Activity connector is responsible for updating the status of the transaction. Apart from this it also collects all the configured Global and tracked proeprties based on stage configuration.
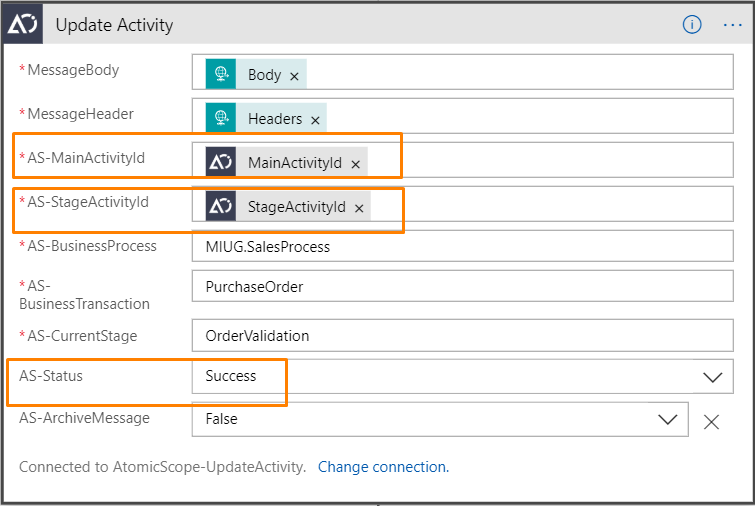
The MiainActivityId and StageActivityId will be the values returned from the StartActivity connector. Once the update activity is executed, it indicates the completion of the stage and the Status flag decides if it was successful or not. In this scenario the flow is successful.
Instrumenting Transformation Azure function
Note: The Azure function is already part of the samples deployed. In this section we will go through code which is used to log activities into Atomic Scope. The Azure function source code is part of the Atomic Scope SDK and can be found in the location C:\Program Files (x86)\Kovai Ltd\AtomicScope\SDK\Samples\Azure\AzureFunctions
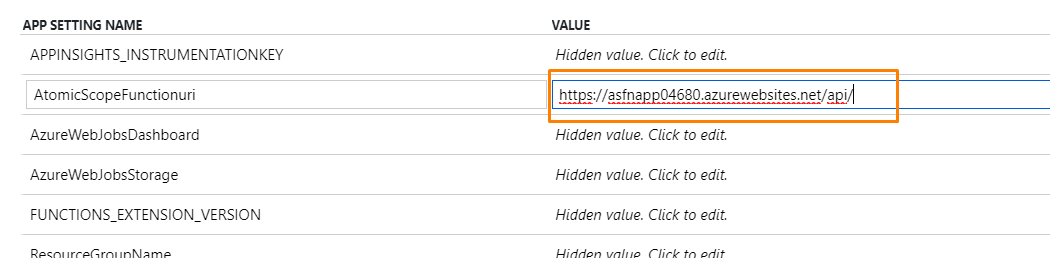
The Azure function makes use of app settings AtomicScopeFunctionuri which stores the Atomic Scope App service url.
Adding Atomic Scope Headers
To log Atomic Scope activies in an Azure function we need to add x-ms-workflow-subscription-id and x-ms-workflow-resourcegroup-name headers which are mandatory for resolving appropriate workspace. Code snippet below shows various headers which need to be added to Atomic Scope requests.
var startActivityUri = new Uri(Environment.GetEnvironmentVariable("AtomicScopeFunctionuri") + "StartActivity");
            var updateActivityUri = new Uri(Environment.GetEnvironmentVariable("AtomicScopeFunctionuri") + "UpdateActivity");
            var subscriptionId = (string)Environment.GetEnvironmentVariable("SubscriptionId");
            var resourceGroupName = (string)Environment.GetEnvironmentVariable("ResourceGroupName");
            var client = new HttpClient();
            client.DefaultRequestHeaders.Add("x-ms-workflow-subscription-id", subscriptionId);
            client.DefaultRequestHeaders.Add("x-ms-workflow-resourcegroup-name", resourceGroupName);
            client.DefaultRequestHeaders.Add("AS-BusinessProcess", "MIUG.SalesProcess");
            client.DefaultRequestHeaders.Add("AS-BusinessTransaction", "PurchaseOrder");
            client.DefaultRequestHeaders.Add("AS-CurrentStage", "Transformation");
            client.DefaultRequestHeaders.Add("AS-ArchiveMessage", "true");
Start Activity
The start activity azure function is used to create a new stage in the transaction processing. The function takes ActivityContent as an input . The activity content object can be created as below.
var messageString = System.Text.Encoding.UTF8.GetString(myMessage.Body);
//End AS code
var activityContent = new ActivityContent()
{
    MessageBody = messageString,
    MessageHeader = myMessage.UserProperties
};
In above code MessageHeader takes any key value pair object such as Http Header, Servicebus Brokered properties etc.
The StartActivity can be invoked as below.
 var json = JsonConvert.SerializeObject(activityContent, Formatting.Indented);
            var startActivityResponse = await client.PostAsync(startActivityUri, new StringContent(json));
Update Activity
StartActivity call returns MainActivityId and StageActivityId . This needs to be used in UpdateActivity request header as below.
var response = startActivityResponse.Content.ReadAsAsync<JObject>().Result; var stageActivityId = response.GetValue("StageActivityId").Value<string>();
var mainActivityId = response.GetValue("MainActivityId").Value<string>();
client.DefaultRequestHeaders.Add("AS-StageActivityId", stageActivityId);
client.DefaultRequestHeaders.Add("AS-MainActivityId", mainActivityId);
client.DefaultRequestHeaders.Add("AS-Status", "Success");
The UpdateActivity Azure function can be invoked as below.
var updateActivityBody = JsonConvert.SerializeObject(activityContent, Formatting.Indented);
await client.PostAsync(updateActivityUri, new StringContent(updateActivityBody));
Instrumenting in Routing Flow logic App
Similar to OrderValidation logic app, RoutingFlowLogicApp will be instrumented with Start and update activity connectors as below.
Start Activity
Update Activity
Running the sample scenario
Using postman, post a message in the file locaiton C:\Program Files (x86)\Kovai Ltd\AtomicScope\SDK\Samples\TestLocations\POsample.json to OrderValidation LogicApp.
Note: Please use application/json as content type while posting the message.
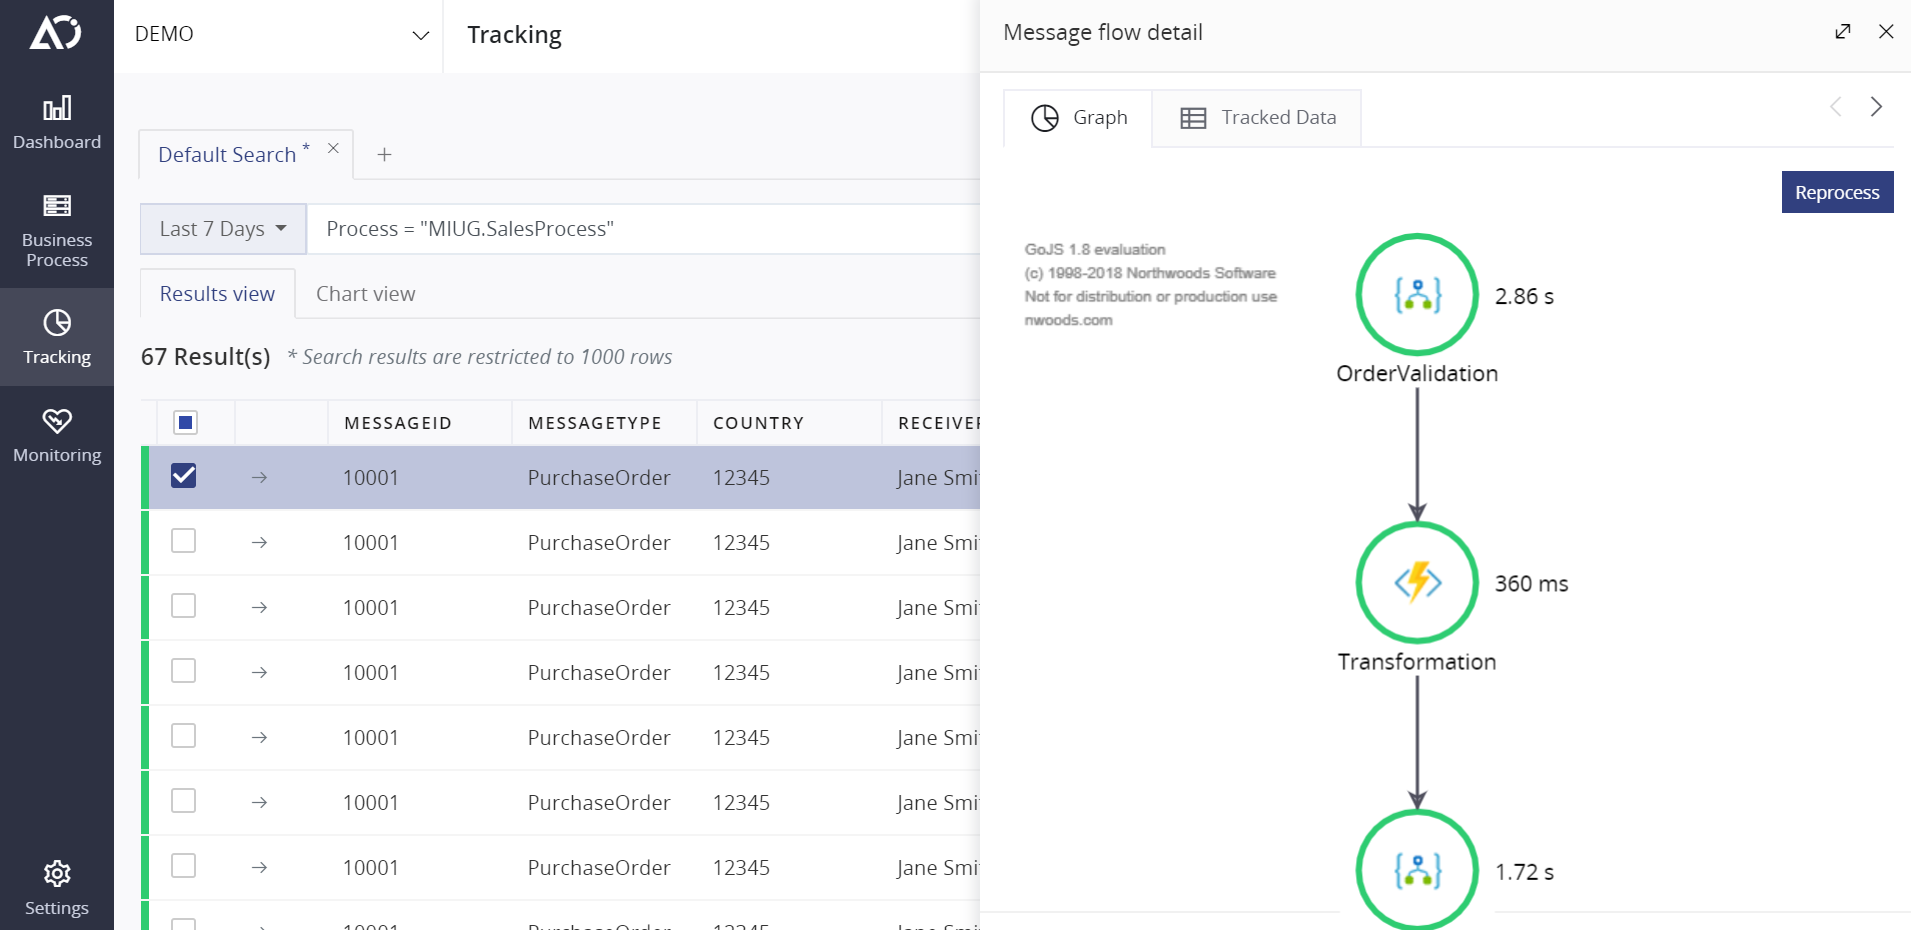
Tracking Flow
When the message is posted you will be able to see an activity in Atomic Scope portal as below.
Summary
In this section you learned how to use AtomicScope in Azure services such as Logic Apps and Azure functions in a cloud only scenario.
Was this article helpful?