Initial Configuration
- 25 May 2023
- 5 Minutes to read
- Print
- DarkLight
- Download PDF
Initial Configuration
- Updated on 25 May 2023
- 5 Minutes to read
- Print
- DarkLight
- Download PDF
Article summary
Did you find this summary helpful?
Thank you for your feedback!
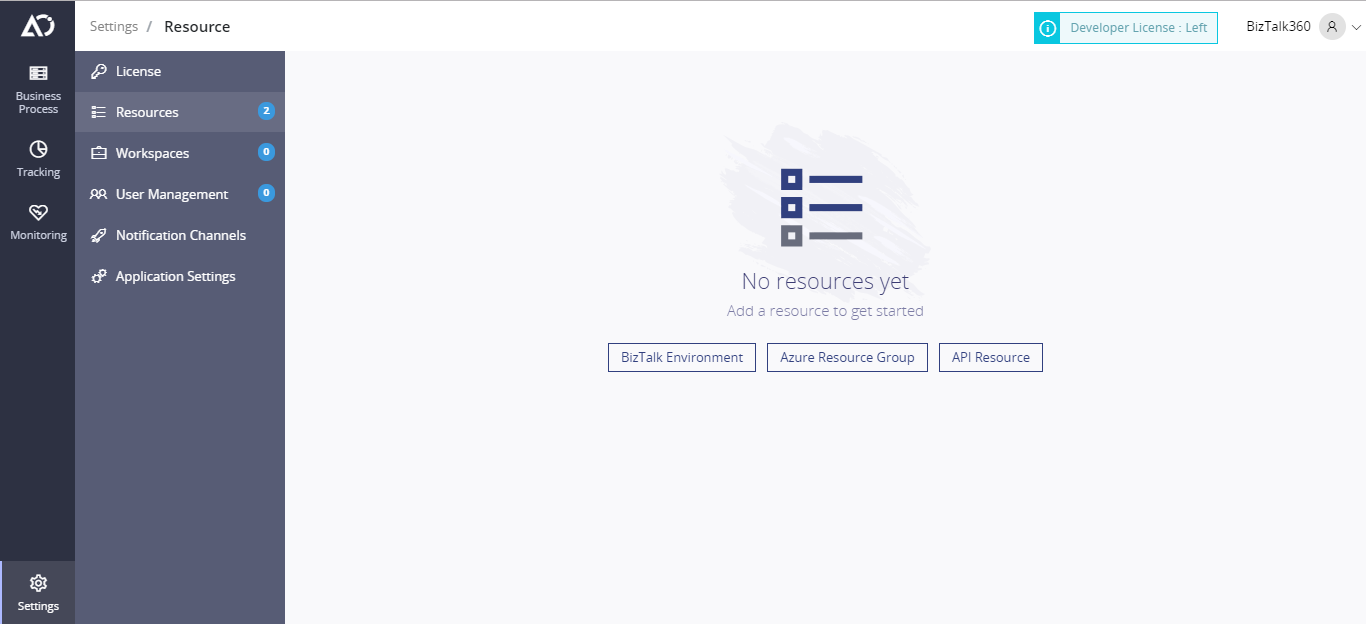
Configure Resources
Once you activated your license you need to add the resources that will participate in the Business Tracking operations. For now, we are supporting BizTalk Server Environment,Azure Resource Group name , API Resource and Flow connectors as the resource. In future, we will be adding diverse types of resources such as SAP, Web Services etc.
- Navigate to Resources from the navigation pane and click on Add Resource and select the type of Resource you need to add.
Add BizTalk Environment
- In the resource page, click Add Resource button and choose Add BizTalk Environment from the drop down.
- In the Create/Edit BizTalk Environment blade give a friendly name to identify the BizTalk Environment and provide the instance name in which BizTalk server database has been hosted and then provide the database name.
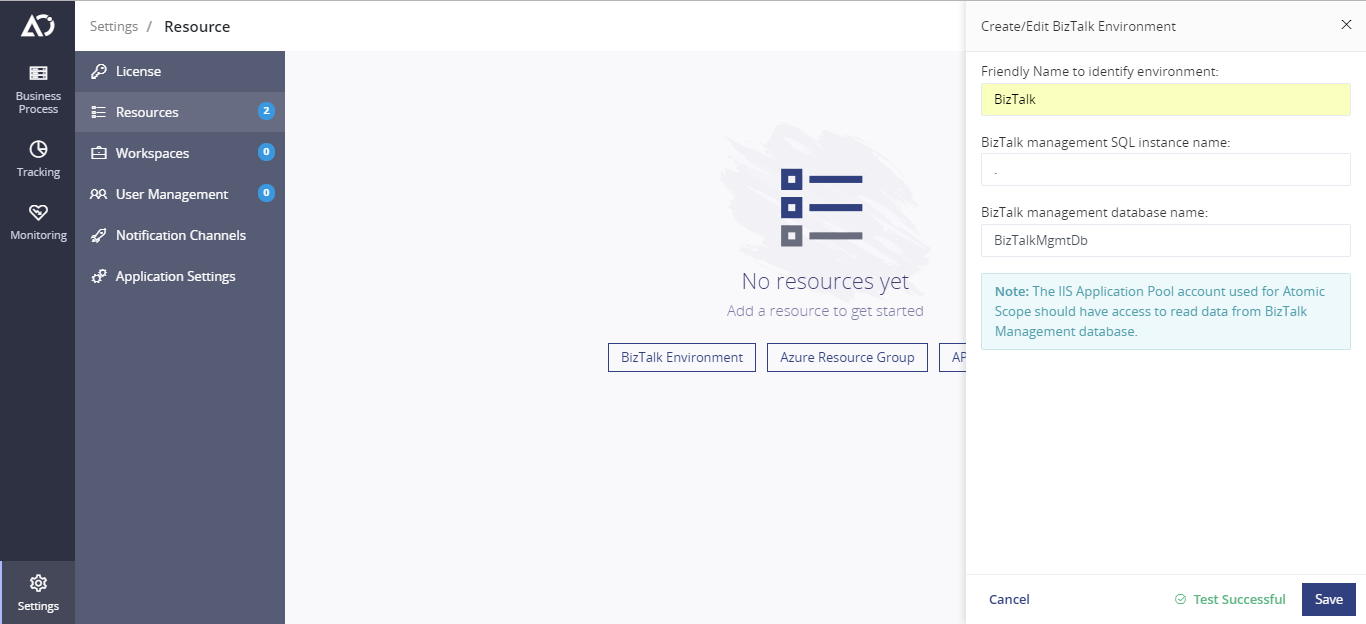
- Click Test Connection to ensure whether the Atomic Scope application can connect to the BizTalk Server.
- And by Clicking Save you can add the BizTalk server to the Resource List.
Add Azure Resource Group
- In the Resource page, click Add Resource and choose Add Azure Resource Group
- In the Create/Edit Azure Resource Group blade provide the Azure subscription id in which the resource group lives and provide the resource group name which will be hosting the Azure Resources like Azure Function and Logic Apps etc.
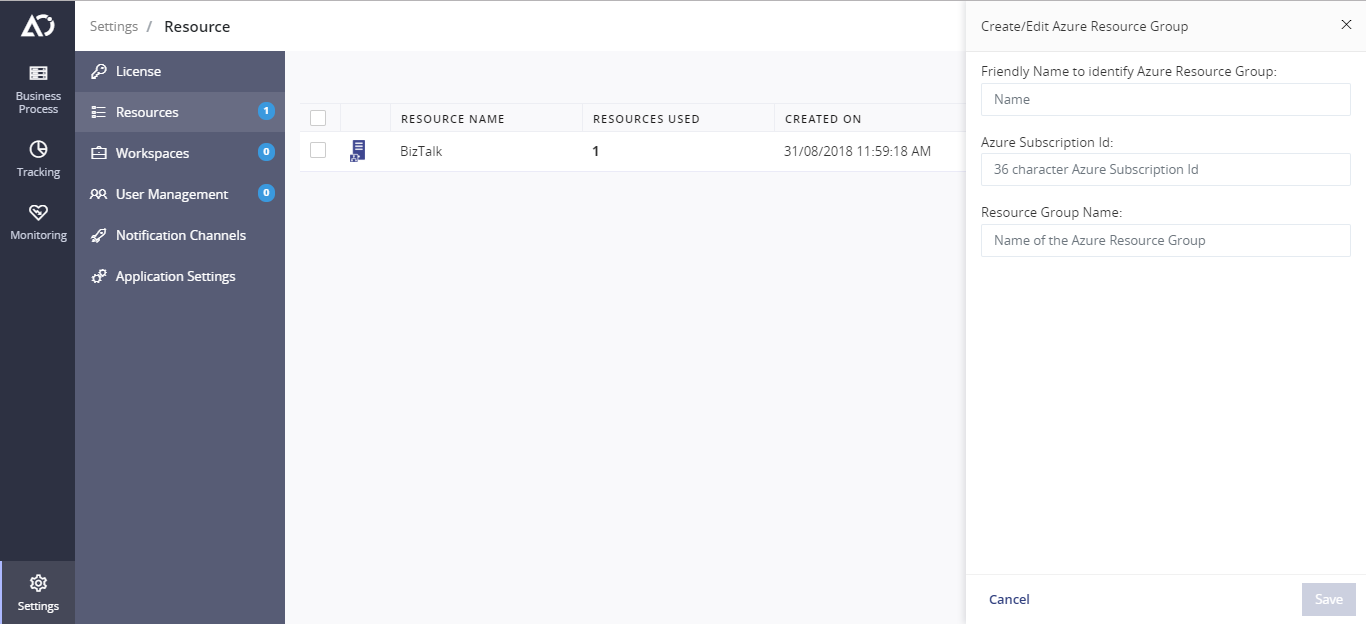
- And provide the Friendly name for the resource to complete the form.
- Click Save to add the Azure Resource Group the Resource List.
- Once you have entered the necessary resources you see that the main resources page to view all the existing resources. If you want the edit a resource you can always click the row to open that resource and start editing.
- If you want to remove a resource from the list you select the resource by clicking the checkbox and click delete button from the page. You can also delete multiple resources by clicking checkbox of each resource.
Add API Resource
- In the Resource page, click Add Resource and choose Add API Resource.
- Enter a friendly name for the Resource and click Done.
- After the resource gets added, if you open it you will be provided with a Resource Id which should be used while invoking Activities.

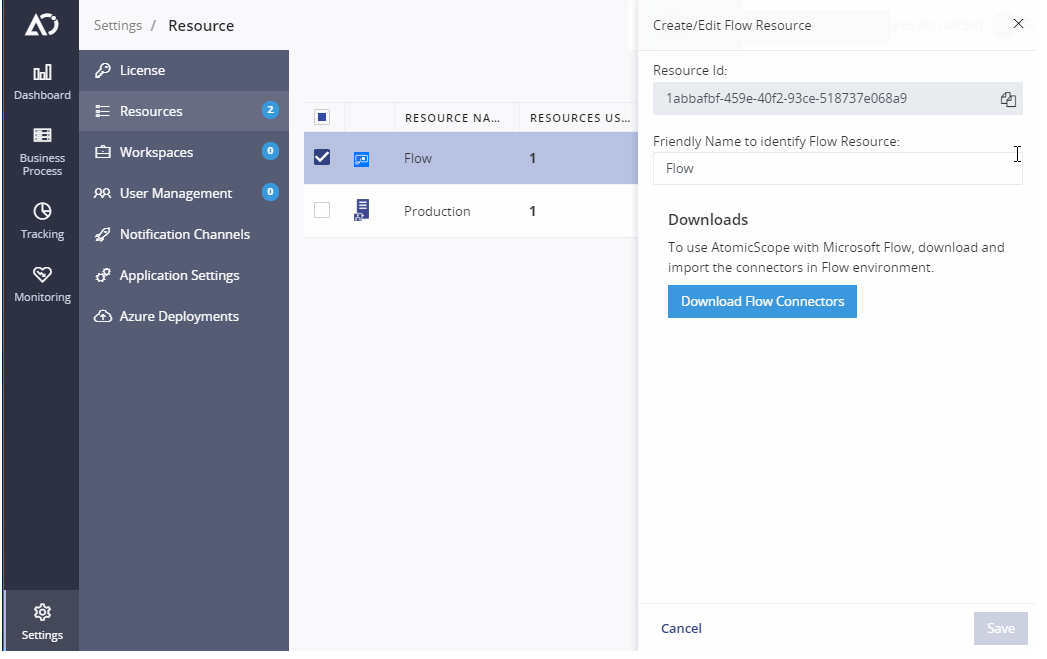
Add Flow Resource
- In the Resource page, click Add Resource and choose Add Flow Resource.
- Enter a friendly name for the Resource and click Done.
- After the resource gets added, if you open it you will be provided with a Resource Id which should be sent in the AS-ResourceId parameter from the Microsoft Flow connector.
- You can also download the necessary connectors from this screen.
Configure Workspace
Workspace is a logical container that encompasses both BizTalk servers and Azure Resource Group. You can either map a workspace to an environment like Dev, Test, Production or to a business unit like Finance, Supply Chain, HR, etc.
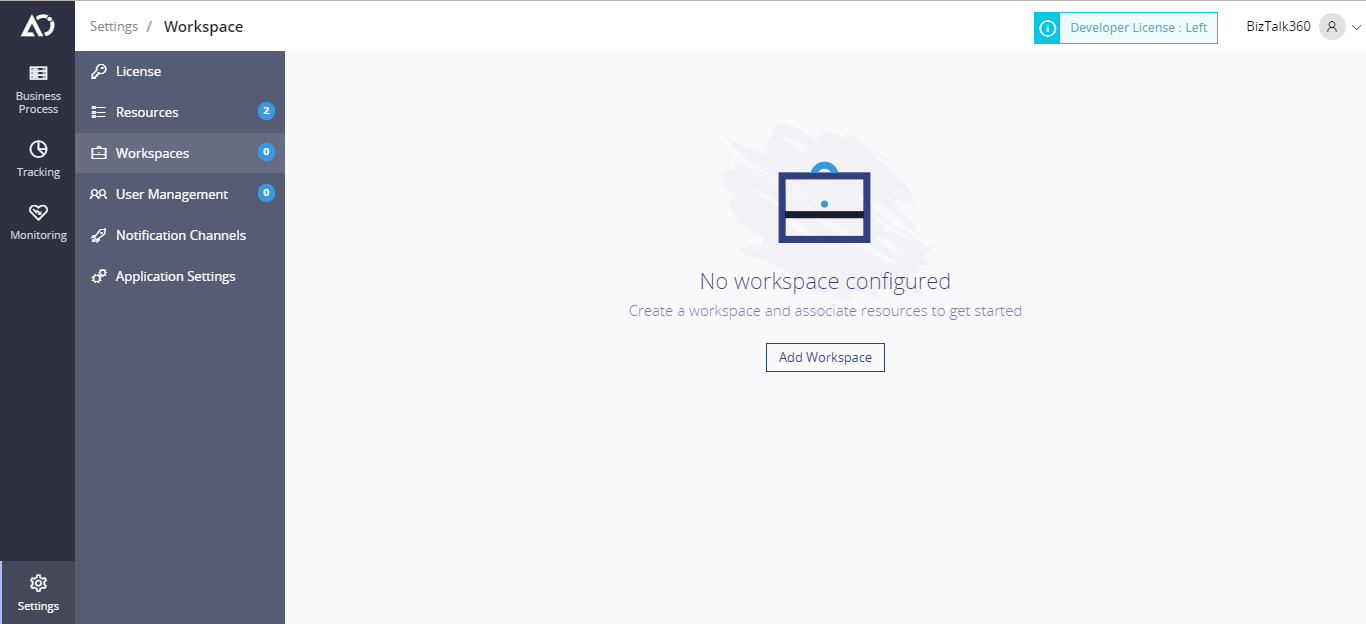
Add a Workspace
When Atomic Scope is deployed, there will not be any Workspace created by default. You will have to create a workspace in the Atomic Scope portal. Follow the below steps to create a workspace in Atomic Scope:
- Open Atomic Scope portal
- Click the Settings icon from the bottom left corner of the screen. Select the Workspaces option from the navigation pane.
- Click the Add Workspace button to add a new workspace.
- In the Create/Edit Workspace blade, enter a friendly name for the Workspace and an optional description and click on Save button to create the workspace.
- The next step is to add Resources and associate them with your Workspace.
- Now you need to Associate the Resources with your Workspace. Navigate back to Workspaces from the navigation pane and click on the workspace that you created in (step 4).
- In the Create/Edit Workspace blade, you will be able to see the available Resources that you have created.
- Click on Associate to associate the resources with the workspace and click on Save button to complete the process.
Configure Application Settings
In this page, you can edit all the Atomic Scope application-related settings.
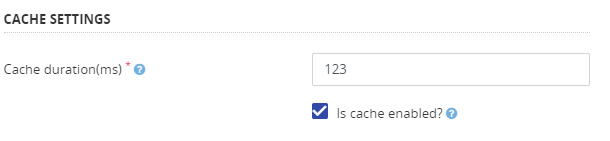
Cache Settings
Atomic Scope internally uses caching for several components to improve the performance of the application.
Using this section, the user will be able to enable or disable the caching for the application.
Cache duration allows the user to set the lifetime of each cached entity in the application.
 !
!
Azure Settings
In this section the user can configure the Azure Settings using which the Atomic Scope will track the events happening in the Logic App.
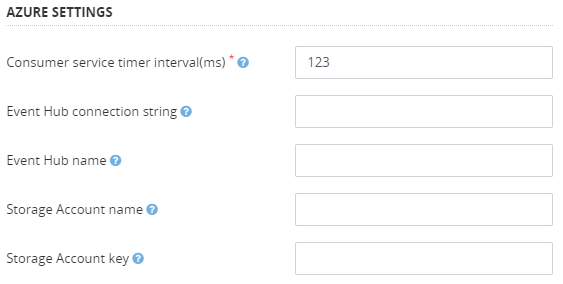
Consumer Service Internal Time – Internal in which the Atomic Scope will have check for new activities.
The below parameters will be inserted automatically as part of deploying Atomic Scope components where the Business Activities are stored.
- Event Hub Connection String
- Event Hub Name
- Storage Account name
- Storage Account Key
Proxy Settings
If the Atomic Scope is deployed in an environment which protected by an enterprise proxy, you need to provide the proxy details in the section for the Atomic Scope application to be able to communicate with the internet.
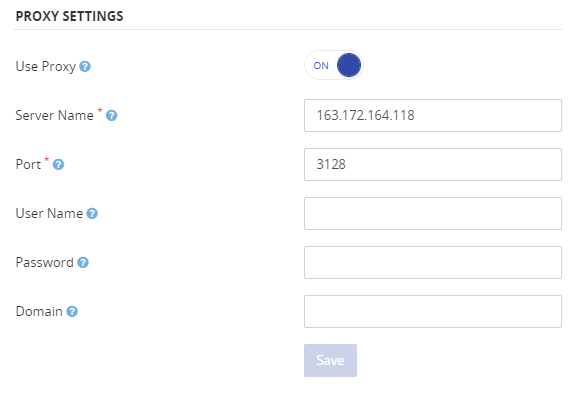
- Server Name – Name of the proxy server.
- Port – Port in which proxy server enables the traffic.
- User Name – If the proxy is protected by a credential this field needs to be populated with the username.
- Password - If the proxy is protected by a credential this field needs to be populated with the password.
- Domain – if the proxy is using a domain , the domain needs to be provided here.
Note: Atomic Scope does not send any data externally it only needs the proxy information in case of Hybrid Scenario Where Atomic Scope needs to communicate with Azure to Track the Logic Apps.
User Management
Atomic Scope uses Windows Authentication for the authentication mechanism. By default, whoever installs the Atomic Scope application will be automatically added as an administrator in the system. The administrator will have complete access to the atomic scope.
Once the application is installed the Administrator can add other users from the AD to the system using this page.
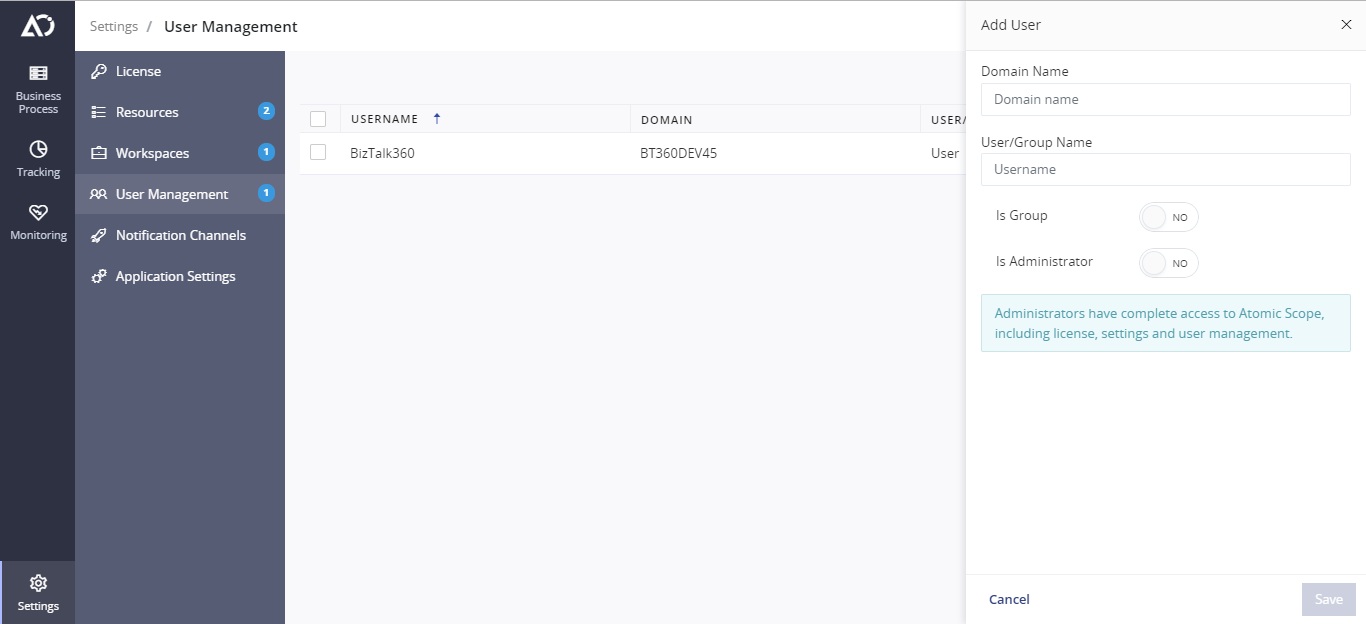
Adding a new user
- Enter the domain name.
- Enter the Username or Group name which must be part of the Windows AD.
- If you have entered group name and switch the button. This is make sure all the users who are part of this windows group will have access to Atomic Scope.
- If you want the user to be an administration switch the Is Administrator button.
Was this article helpful?